How to install Windows 11 Professional
How to install from Windows Update
The simplest way to get Windows 11 is via Windows Update. You'll know that it's ready for your PC because you'll see messaging for it in Windows Update. Follow these instructions to proceed with the installation. You won't lose any data or files on your PC with this option.
Step 1: Head over to Settings > Update & security. From there, click Check for updates.
Step 2: You should notice a prompt for Upgrade to Windows 11 is ready, and it's free. Click the blue Download and install button and agree to the terms with the Accept and install button.
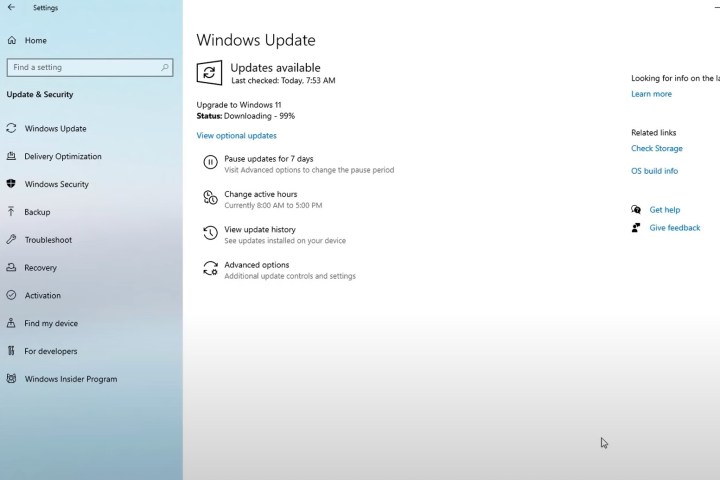
Step 3: You should then see the Upgrade to Windows 11 appear under Windows Update, with a percentage and download status. Wait for it to complete.
Step 4: When finished, you'll get a prompt to restart your PC. It'll show up in a blue box. Choose the Restart now option. Your PC will proceed with Windows 11 installation and will restart a few times. When finished, you'll be taken to the Windows 11 desktop!
How to install through the Installation Assistant
If you're not seeing Windows 11 in Windows Update, you can use the Windows 11 Installation Assistant instead. This manually will upgrade you from Windows 10 to the new OS. Again, using this method, you'll have to ensure your PC meets Microsoft's minimum specs. You won't lose any files, either. Here's how.
Step 1: Visit Microsoft's Windows 11 download website. Look at the top for the Windows 11 Installation Assistant option and click the blue Download now button.
Step 2: Wait for the tool to download. When complete, launch it. Click Yes when prompted.
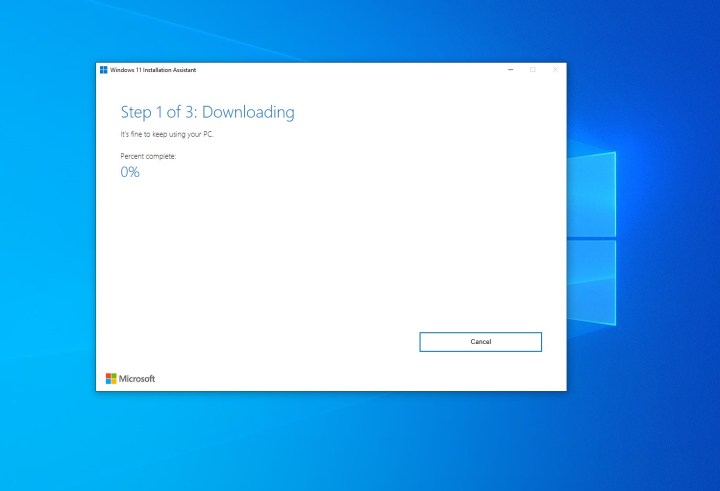
Step 3: In the pop-up box, you'll have to choose Accept and install. From here on out, it will be a three-step process. Wait for Windows 11 to download as part of the first step. It could take a while depending on your connection speed. You might be prompted to agree to the Microsoft terms and service.
Step 4: In the second step, Windows 11 will verify the integrity of your download. It should take a few seconds.
Step 5: In the third step, you'll get a prompt about Windows 11 installing in the background. Let it install and wait it out. Depending on the speed of your PC, it could take a while — usually 30 minutes, tops.
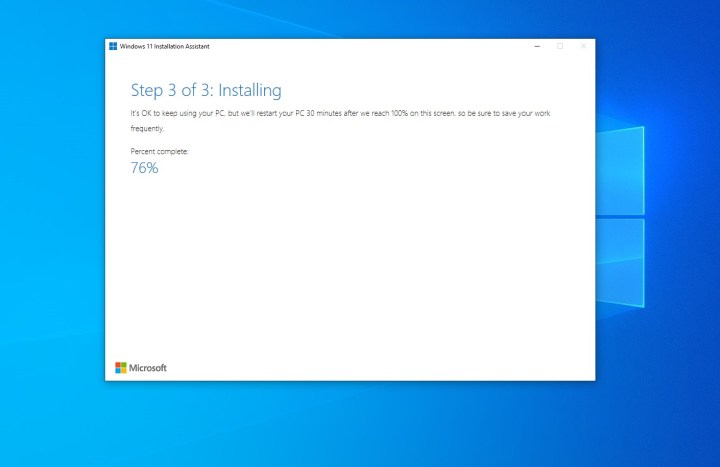
Step 6: Once the third phase is finished, click the Restart now button. You'll be prompted that you are about to be signed out. Wait while your PC restarts and installs Windows 11. It could take up to 30 minutes or an hour based on the speed and age of your PC and your CPU.
Step 7: While Windows 11 is installing, you'll see Working on updates on your screen. A percentage will indicate the progress. Your PC will restart a few times, so be patient. Once complete, you'll be taken to the sign-in page, and then the Windows 11 desktop.
How to clean install with Windows 11 Installation Media
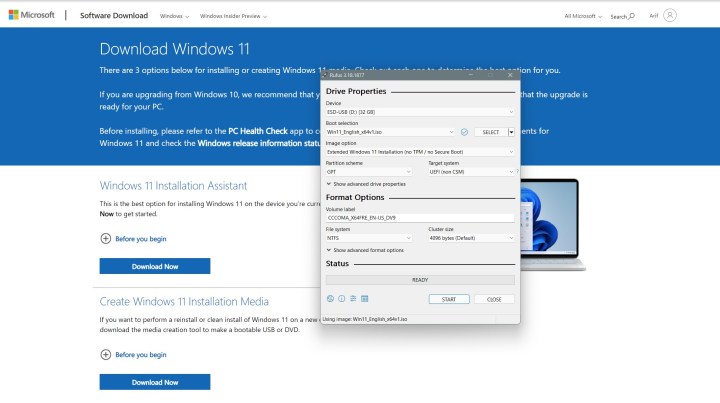
Another way to install Windows 11 is with Installation Media. This is a way to create a bootable USB drive that you can use to clean install Windows 11 on your current Windows 10 PC or on another device. Doing so will remove all of your files, so we advise against this method. If you're aware of this risk, you can get to this option by going to the Windows 11 Download Page. From there, choose the Create Windows 11 Installation Media option. Then, follow the steps below.
Step 1: Agree to the terms and choose Accept. Let the Setup tool run, and choose Use the recommended options for this PC. Click Next, and choose USB flash drive.
Step 2: Choose your USB flash drive from the list and then click Next. You'll be prompted and Windows 11 will download to it. Once finished, the installer will switch to Creating Windows 11 Installation media. You'll know when it's finished, as you'll get a prompt that the drive is ready.

Step 3: Once your USB drive is ready, close the installer with the Finish button. Keep the USB drive plugged into your PC.
Step 4: Head back to the Windows 10 settings app, and choose Update & security. Then choose Recovery on the left side. Under Advanced startup, choose the Restart now option.
Step 5: In the pop-up prompt, choose Use a device. Your USB drive should appear listed. Choose it, and Windows will restart to your USB drive and Windows 11 installer. If you don't see this option, you'll need to head into your BIOS or UEFI to manually boot from the USB drive. Usually, you can do this by pressing F12 on boot as soon as you turn on your PC. Contact your PC maker for more information on this or consult online guides.
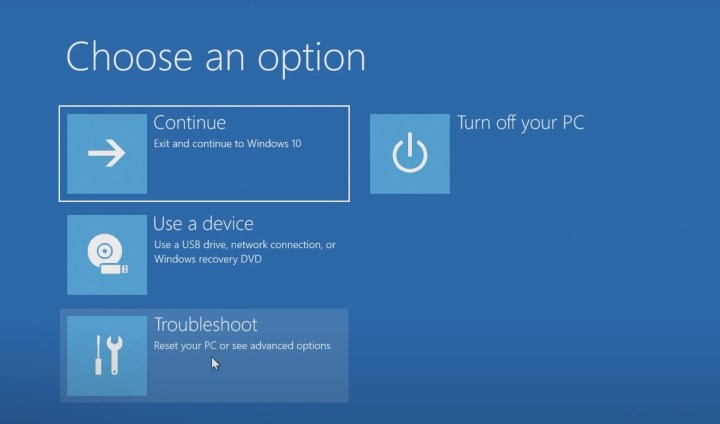
Step 6: Once in the Windows 11 installer, select a language, and click Next. Pick the version of Windows 11 that matches the version of Windows 10 on your PC. and click Next.
Step 7: Choose the Custom option and choose the drive to install Windows 11 on. You might have to click the Format button to erase all your files on the drive. When done, select the drive again and click Next.
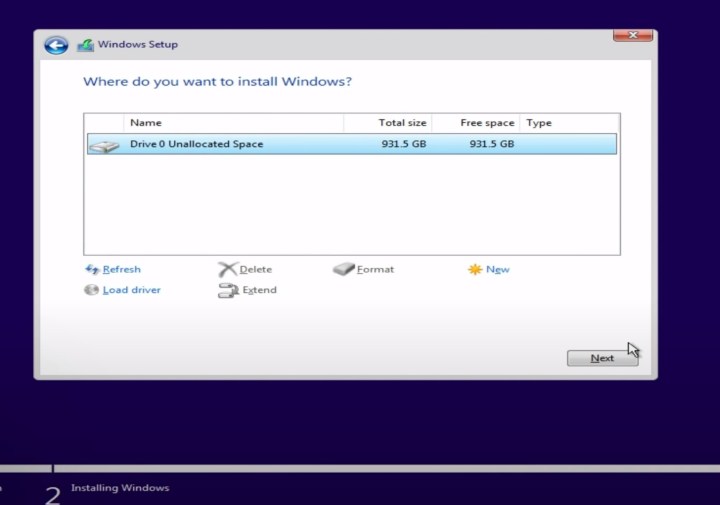
Step 8: Windows 11 will install to your PC, and you can sit back. You'll then be taken to the out-of-box experience, and will be prompted to set up your PC again.
